
During the Office 365 Local Meetup Group, I had the opportunity to share how we can integrate Power Automate in our Microsoft Teams to approve an invoice. In this blog post, I will show you how I do it.
Doing multiple tasks by switching to different application that you are working disrupts your productivity and time consuming.
As Microsoft Teams is a hub for teamwork were you have chats, calls, meetings and applications, we can actually automate our processes from there. This could help us automate our day to day manual processes in just a click of a button.
Let’s take a look at this scenario:
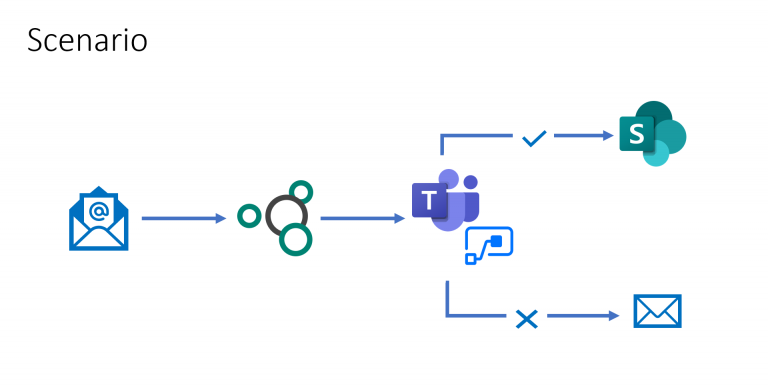
In your marketing department, you received an email from your shared mailbox with an attached invoices from your vendor. For auditing purposes, you always save the data to your SharePoint list after your Manager approves it. Instead of printing the invoices and checking your emails, we can use Microsoft Teams to post a message and initiate an approval from there. Without using a code, we can automate this process using Power Automate to Microsoft Teams.
What we are going to do:
- You need to build your AI Model using Form Processing in AI Builder to extract the information in the attached email. In my previous blog post, you can see how to build it in AI Model using Form Processing in three simple steps.
- In Power Automate, we are going to use the Get attachments action in our flow.
- Use Predict action to get the value from our AI Builder Model.
- Use the Post messages action in our flow to send messages in our Microsoft Teams.
- To accept an approval in Microsoft Teams, we need to integrate Microsoft Teams with Flow app.
- If approves, we will create a list item in our SharePoint list.
- Send an email to the user if the request is rejected.
Let’s Get Started:
We are going to integrate Flow app in our Microsoft Teams as we need it later for approval process. To install the app, click the “More” apps in Microsoft Teams. Search for Flow if you can’t find it in the app, then Click Flow and then Add. Flow app is tied to your identity or your use account.

After installing our Flow app, we will create our flow in Power Automate. Our flow should be created under Solutions as the Predict action can be use only within the solutions.
If you want a separate Solutions to build your flow, create a New Solution.

On my end, I created a Marketing Invoice solution. Within the Marketing Invoice solutions, we will create a New Flow.

Now, we are going to build our flow. First we are going to get the attachment in our shared mailbox. When new email arrives in a shared mailbox is our trigger. Because we are going to get the attachments, we select Yes in Only with Attachments and then Include Attachments.

Next, we are going to get the values in our AI Model named MarketingInvoice. Our Model under Predict action is the model name of the Form Processing model that I created in AI Builder. And because we are getting the Attachments in an email, it will be in Apply to each.
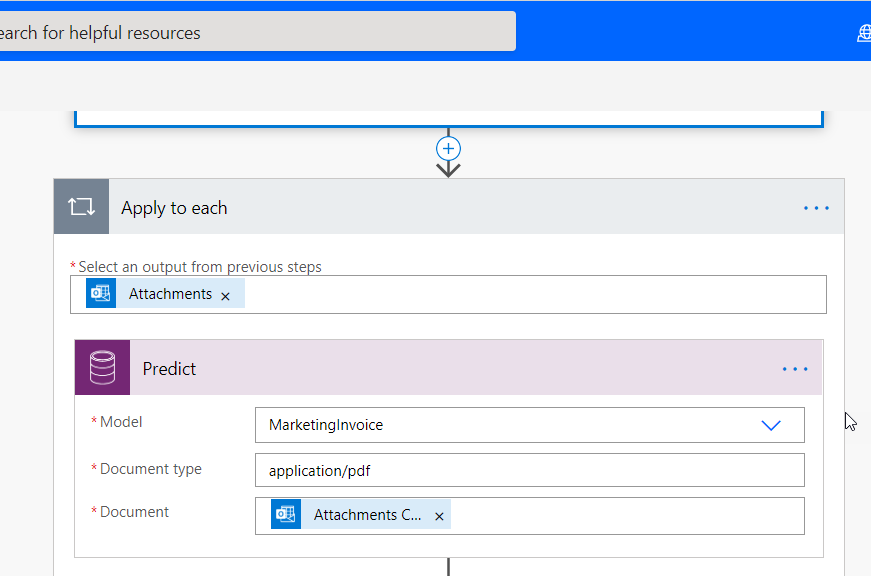
- Model: MarketingInvoice
- Document type: application/pdf (you could use application/png or application/jpg if the invoice is in image)
- Document: Attachments Content from the new email arrives in our shared mailbox
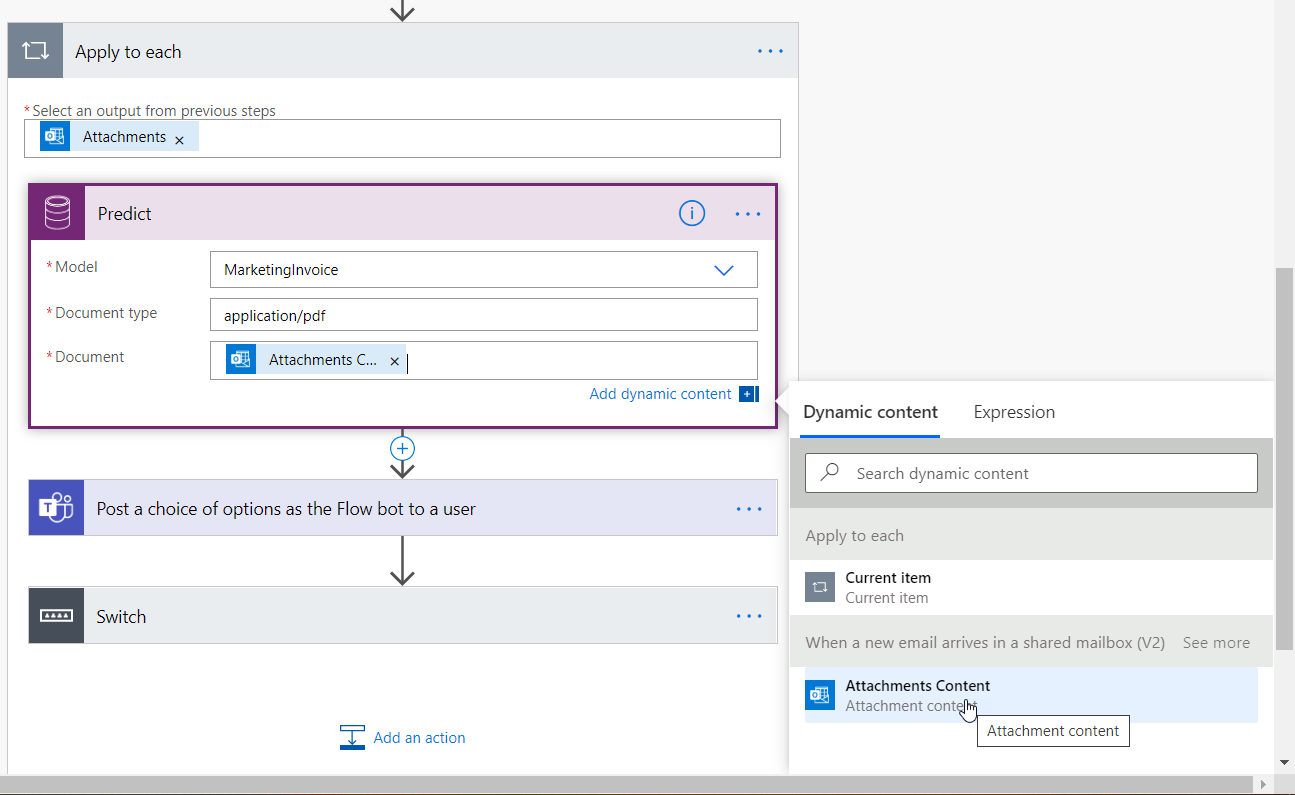
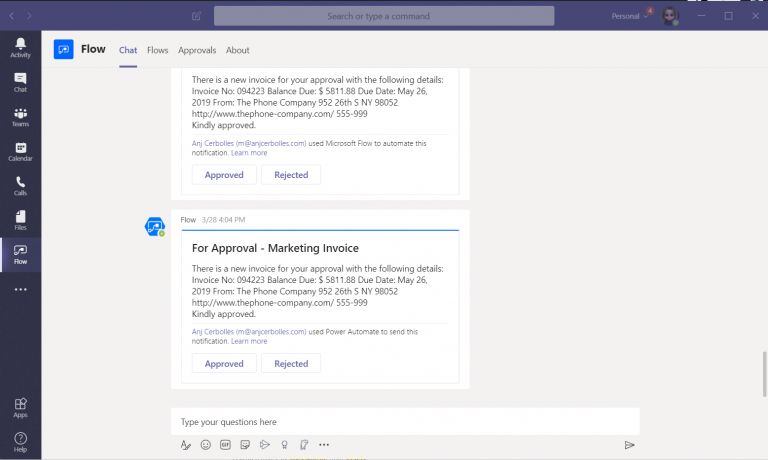
Next is we are going to Post a message in our Microsoft Teams using the Flow bot. In the Add an action, look for Microsoft Teams. You will see a lot of Actions that you could use in your Microsoft Teams. You could use this to create a channel, post a message in your teams or post an Adaptive Card.


But for this blog, we are going to use the Post a choice of options as the Flow bot to a user.

The options are the actions that we need to display in our Teams message. As we are going to approve an invoice, we use Approved in option item – 1 and then Rejected in option item – 2.
- Headline – For approval – Marketing Invoice
- Recipient – Email of the approver
- Message – content of the message; We are going to use the Invoice Value, Balance Due Date Value, Due Date Value and From Value of the company who sent the invoice. To get this value, you need to add the dynamic content which come from the Predict action.

After formulating all the information needed to post in Microsoft Teams, we are now going to get the response of the approver using the Switch condition. In Switch *On, we are going to use the selectedOption from the Post a choice of options as the Flow bot to a user action in the dynamic content.

In Case 1, if the value equals Approved we are going to create an item in SharePoint list, using the value from the Predict action.
In Case 2, if the value equals Rejected, we are going to send an email to shared mailbox.

After creating your flow, save and you can test it.

Featured image by Alex Knight from Pexels