
As I started brainstorming content ideas for my organization’s internal community and upcoming blog, I felt excited and energized. I tend to write all my ideas on the memo pad as I love writing my ideas using pen and paper. But as the days went on and the list of ideas grew longer, I had difficulty remembering to track the content I needed to post and often forgot where I put my content.
There is a bunch of tools that you can use, but I want only to track and plan the content that I need to post. As I considered what tools to use, I remembered Microsoft Lists has a content scheduler template. Microsoft Lists has 14 templates with pre-configured layouts that include columns, column formatting, and data structure. This template can be customized that fit your requirements.
So, I launched Microsoft Lists and created a template using the Content Scheduler. There are two templates for Content Scheduler; the other has approval. I use the Content Scheduler without approval as this is only for personal use, and I don’t need to seek approval for the content I need to post.


Here’s how I do it:
There are multiple ways to create Microsoft Lists; you can create them from the SharePoint app bar, the Microsoft Lists app, or the SharePoint site.
- Select a New List and select the ‘Content Scheduler’ template. Type in the Name of your Lists, Description, choose your desired color, icon, and Save to. My Content Scheduler is saved in My Lists. You can change where you want to save it could be on another SharePoint site. Then ‘Create’ your list from the template you selected.

- After creation, there will be a message box if you want to set up a feature: Publishing date reminders flow. This reminder will send you a message three days before the draft due date or the publish date. This will send a notification to the author (Which is great! 🙂 )
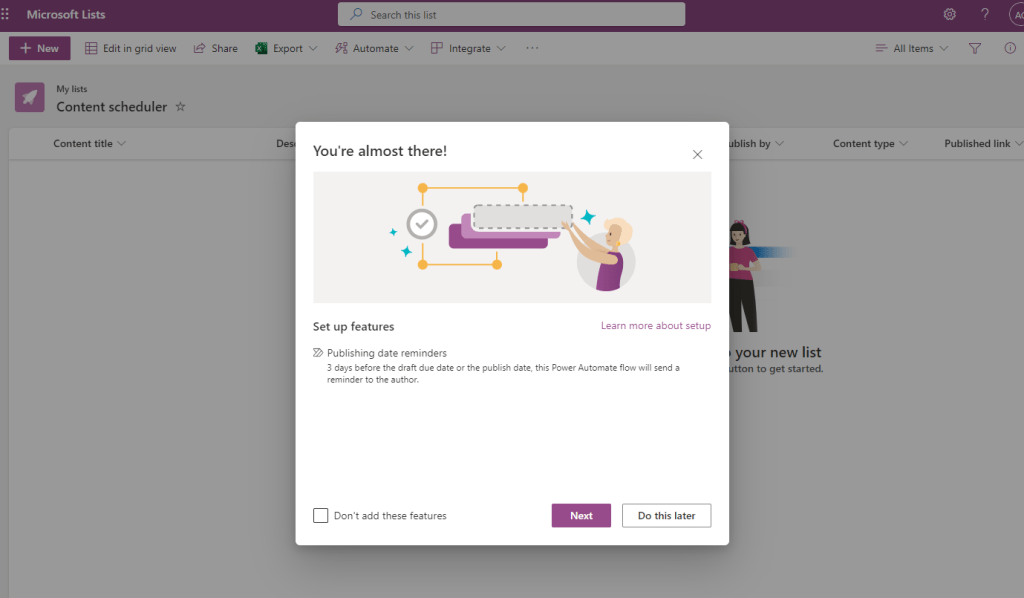
Select Do this later if you don’t want to add this feature. If you want to add, select Next, then it will connect to your data connection which is Office 365 Outlook and SharePoint.

Select Next, and this feature will set up and notify you when it’s done.

- Set up your weekly calendar view to see your content at a glance on what the content is due for this week. To set this up, navigate to the “Views” tab and select “Calendar view.” You can customize your Calendar view by Monthly or Weekly layout. I choose the Week layout.

You can apply formatting to your calendar view. I used the Status field to format the items.

You can now start scheduling your content. Add new items to the list, and fill in the necessary details, such as the title, description, and publication date.
Publishing date reminders Flow
The publishing date reminders flow runs automatically daily to check for any upcoming draft or publish dates due within the next three days. This helpful feature ensures you never miss a deadline and your content is always posted on time. Additionally, you can customize the email notification according to your specific needs and preferences. This allows you to tailor the reminders to your unique workflow and ensure you stay on track with your content creation and publishing tasks.
To access and customize this Flow, from https://make.powerautomate.com, select My Flows and then look for Publishing date reminders.

To customize the email content and publish, edit the Flow accordingly.

Conclusion:
If you struggle to manage your content across different platforms, the Content Scheduler template in Microsoft Lists is a great way to start. Its pre-built columns and calendar view make tracking and managing your content accessible.