
See Part II of my Blog here: Repeating Tables in Power Apps using SharePoint List Form 2.0.
As InfoPath is nearing retirement, a lot of migration is going on from InfoPath to Power Apps. The common question is how to address the repeating tables in Power Apps. As I’m doing the proof of concept and researching, I stumbled upon Shane Young’s video about how you will create repeating tables using the Power Apps canvas app. There are three videos in his series that you could use for your reference. I wrote this blog mainly because of references for any new projects using the repeating tables. I could still refer to Shane Young’s video when I’m going to build the repeating tables, but I don’t want to use the time to go back and forth to the video when I’m making the application.
“Repeating tables” is used for one to many relationship items when building e-forms using InfoPath. When you use Power Apps to update your SharePoint list form, one to many relationship tables is not available. So what we need to do is we are going to refer to Shane Young’s video in creating a repeating table using Power Apps.

Requirements:
In this blog, we are going to create a simple invoice e-form. We are going to use SharePoint lists and Power Apps to modify the list form. Assuming you know how to create a list in SharePoint. We need two SharePoint lists: Master Lists & Child Lists (I used this naming convention in the list for easy understanding 😉
- Master Lists – all the requests of the user will save in these lists. The columns that we need to create are the following:
- Reference ID (Renamed the Title field to Reference ID)
- Description – Multi-Line Text
- Child Lists – We will use this list to to record all the Item Name of a specific Reference ID from the Master lists. The columns that we need are the following:
- Title
- cldItemName
- cldQty
- cldPrice
Create Item
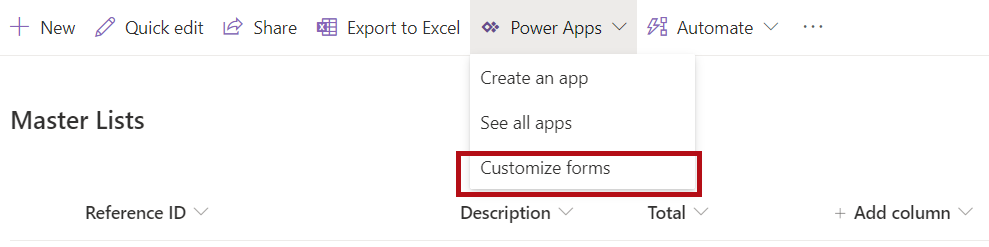
From the Master’s List, we are going to customize the list form using Power Apps.
- Select Power Apps >> Customize forms in the command bar of the Master Lists.
- From the Data sources, add the Child Lists SharePoint list.

- Rename the FormScreen1 to CreateScreen in the screen name properties. Then under the CreateScreen, rename SharePointForm1 to CreateItemForm.

- In the CreateItemForm, I removed the unnecessary fields and remained in the below. We will use the Reference ID value to store the lists of the items to the Child Lists.
- Reference ID
- Description
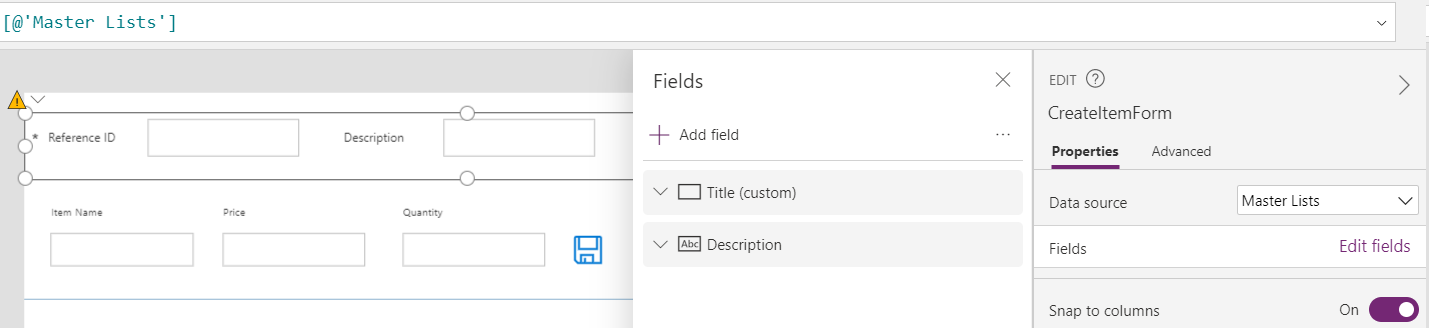
Fields in Master Lists
- Then add a new Gallery and rename it to CreateGalleryItems. Add three fields, three labels and save icon.
- txtPriceCreate
- txtQtyCreate
- txtItemNameCreate
- lblPriceCreate
- lblQtyCreate
- lblItemNameCreate

- In SharePointIntegration under OnNew action, add the code below:

NewForm(CreateItemForm);
ClearCollect(colInvoice,{LineItem: "",LinePrice: "", LineQty: ""});
Set(SharePointFormMode,"CreateForm");
Navigate(CreateScreen,Transition.None)
SharePointIntegration OnNew Action
- In the Items in the CreateGalleryItems, add the colInvoice collection.

- Set the following Defaults of the following fields in the CreateGalleryItems:
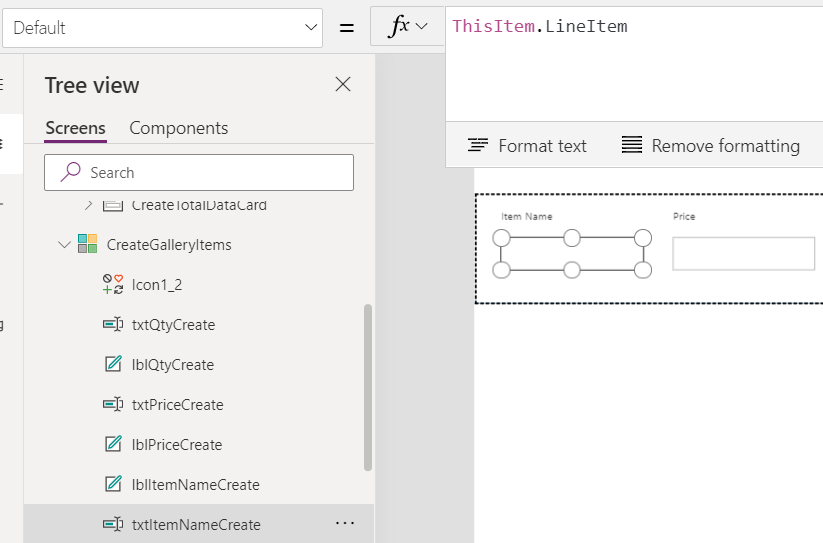
txtItemNameCreate >> Default = ThisItem.LineItem

txtPriceCreate >> Default = ThisItem.LinePrice

txtQtyCreate >> Default = Thisitem.LineQty
- Select the save icon in the CreateGalleryItems, then insert the following code in the OnSelect.

Patch(colInvoice,ThisItem, {LineItem:txtItemNameCreate.Text,LinePrice:Value(txtPriceCreate.Text),LineQty:Value(txtQtyCreate.Text)});Collect(colInvoice,LineItem:"",LinePrice:"",LineQty:""})
- Then select the CreateItemForm, under OnSuccess, type in the code below:

ForAll(colInvoice,If(!IsBlank(LineItem),Patch('Child Lists',Defaults('Child Lists'),{Title:CreateItemForm.LastSubmit.Title,cldItemName:LineItem,cldPrice:Value(LinePrice),cldQty:Value(LineQty)})));
ResetForm(Self);
RequestHide();
- Save your app and then publish it.

Edit Item
- From the CreateScreen, duplicate the screen twice. Rename the first duplicate to EditScreen and the other one is ShowScreen.

- We are going to focus on the EditScreen. Rename the forms to EditItemForm and the gallery to EditGalleryItems.

- In the EditGalleryItems under Items, type in this code:
Filter('Child Lists', DataCardValue1.Text = Title)
The DataCardValue1.Text is from the EditItemForm >> EditTitleDataCard, which is the Title column of the Master Lists. The Title is the Child Lists Title column.

- Rename the text fields with and the labels in the EditGalleryItems with the following:
txtQtylblQtytxtPricelblPricetxtItemNamelblItemName- Change the save icon to Cancel icon

- In the EditGalleryItems, update Default value of the following fields.
txtItemName >>Default = ThisItem.cldItemNametxtPrice >> Default = ThisItem.cldPricetxtQty >> Default = ThisItem.cldQty

- In SharePointIntegration under OnEdit, add the code below:

Set(SharePointFormMode,"EditForm");
EditForm(EditItemForm);
Navigate(EditScreen, ScreenTransition.None)
- Back to the EditScreen, in the following fields below, insert the code below in the OnChange Actions. The purpose of this code is whenever the user update the text field, it will update as well in the SharePoint lists.

txtItemName >> OnChange = Patch('Child Lists',ThisItem,{cldItemName:txtItemName.Text})

txtQty >> OnChange = Patch('Child Lists',ThisItem,{cldQty:Value(txtQty.Text)})
In the Cancel icon, because if we select this icon, we are going to remove the records. We are going to put this code in the OnSelect action:

Remove('Child Lists',EditGalleryItems.Selected)
- Save the application and published it.

Show Item
- In the ShowScreen, rename the form to ShowItemForm and the gallery to ShowGalleryItems.

- Rename the following fields too: (You can name your fields that are easier for you to understand.)
txtQtyShowlblQtyShowtxtPriceShowlblPriceShowlblItemNameShowtxtItemNameShow

- In the ShowGalleryItems, remove the icon. In the Items properties, write this code:

Filter('Child Lists', Title = DataCardValue1_1.Text)
- In the SharePointIntegration, under OnView action write this code:

Set(SharePointFormMode,"ShowForm");ViewForm(ShowItemForm);Navigate(ShowScreen,ScreenTransition.None)
- Save your application and publish it.
I hope this blog will help you for your future reference. 😉
See Part II of my Blog here: Repeating Tables in Power Apps using SharePoint List Form 2.0.