
During Microsoft Business Applications Summit 2019, AI Builder for Power Platform was introduced. AI Builder (preview) can directly integrate to Power Apps and Power Automate. You can now automate your workflow and integrate AI in your business processes.

As of this writing, AI Builder is still in Preview mode for all Power Apps users in North America and Europe. If you are not in these countries, you can create a new environment in Power Apps using these regions. My default region is in Asia in which I created a new environment using North America. Because of this, I was able to experience the AI Builder in my Power Apps environment. In creating a new environment, check your license on how many environment is allowed.
AI Builder (preview) can be seen in Power Apps and Power Automate navigation.

There are different AI Models in AI Builder (preview) that you can utilize for your business needs.
- Binary Classification

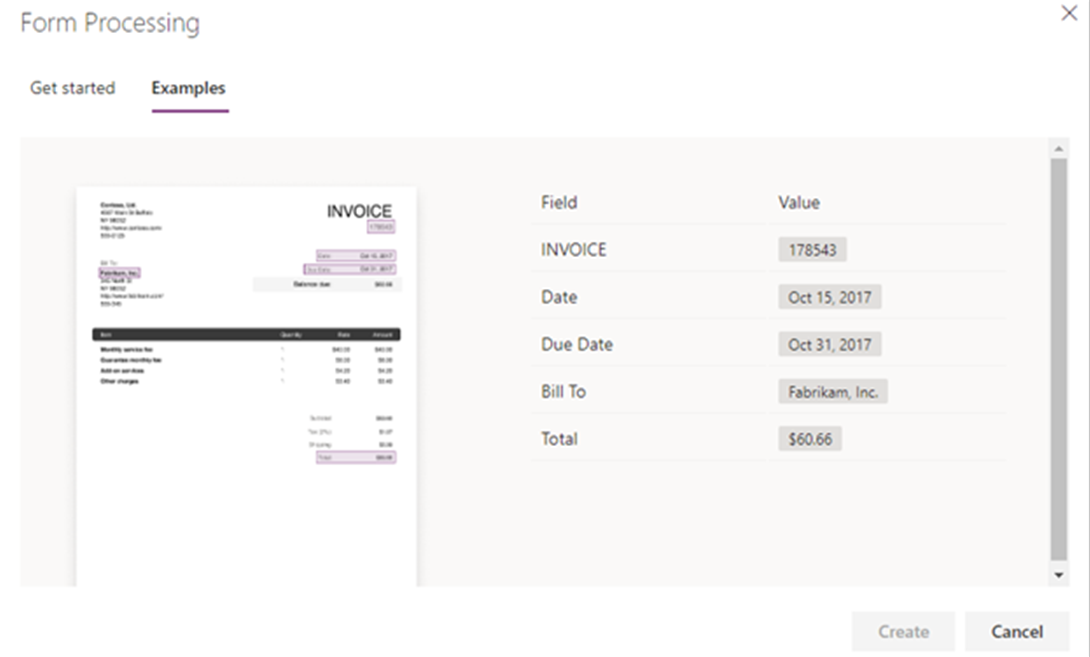
- Form Processing
- Object Detection

- Text Classification

- Business Card Reader

You can find the Business Card Reader in Power Apps studio. I did some experiments with business card reader in Power Apps and saved the extracted data from the reader to SharePoint List.
How did I do It?
I started creating the SharePoint List and named it as Business Cards (not a creative title). This will list digitally all my business cards for future references just in case I lost the cards. Here are the list of the columns that I created.

These columns will be bound to the business card reader properties. Next is to open PowerApps studio in the browser. Make sure you are in the correct environment (with AI Builder preview environment). Then create a new blank Canvas, name your app and select your format (Phone or Tablet). I’m going to use the phone format, fill the App name and click Create.

In the screen, select the Insert in the ribbon and click the AI Builder (preview) drop-down. You will see the Business card reader, Form processor and Object detector. We will select the Business card reader.


We wanted to extract the data from Business card reader to SharePoint list. So, to get the extracted data, we need to add it to the form. To insert a Form, click Insert and then Forms, select Edit Form.

The extracted data will be a new data in the list, so we will change the Default mode of the Form1 from Edit to New.

If you already added your data source which is your SharePoint list, select the Data Source from Form1 and select your SharePoint list.

Under the Data source of Form1, click the Edit fields, to display the fields that you need. You can either add or remove the fields.

We are going to bind the scanned data to each of the fields. The Title field of the form will bind to the name of the scanned business card, Company name to Company field and so on.
To bind the scanner to field, click the Title, make sure the DataCardValue1 of Title_DataCard1 is selected. Click Advanced, click Unlock to change properties, this will make the Default function editable. Change the Parent.Default function to BusinessCardReader1.FullName. This will get the Full Name in the business card.

Do the same with the other fields. Power Apps has intelliSense which it could be easy for you to populate other fields and bind the properties of the Business Card Reader.

Once your done binding the fields within the Forms. Click Screen1 and then insert button.


Update the OnSelect function of the button from false to SubmitForm(Form1). This function will submit the form to SharePoint list.

Save your application and then Publish it. Try and test your app now!


Formatted the list using List View Formatting
Happy Building! #PowerAddicts
To learn more about the roadmap and releases, below are the references: